IanCanada
UcPure Pro Flagship Pure Ultracapacitor Power Supply 2025
UcPure Pro Flagship Pure Ultracapacitor Power Supply 2025
Couldn't load pickup availability
Introduction
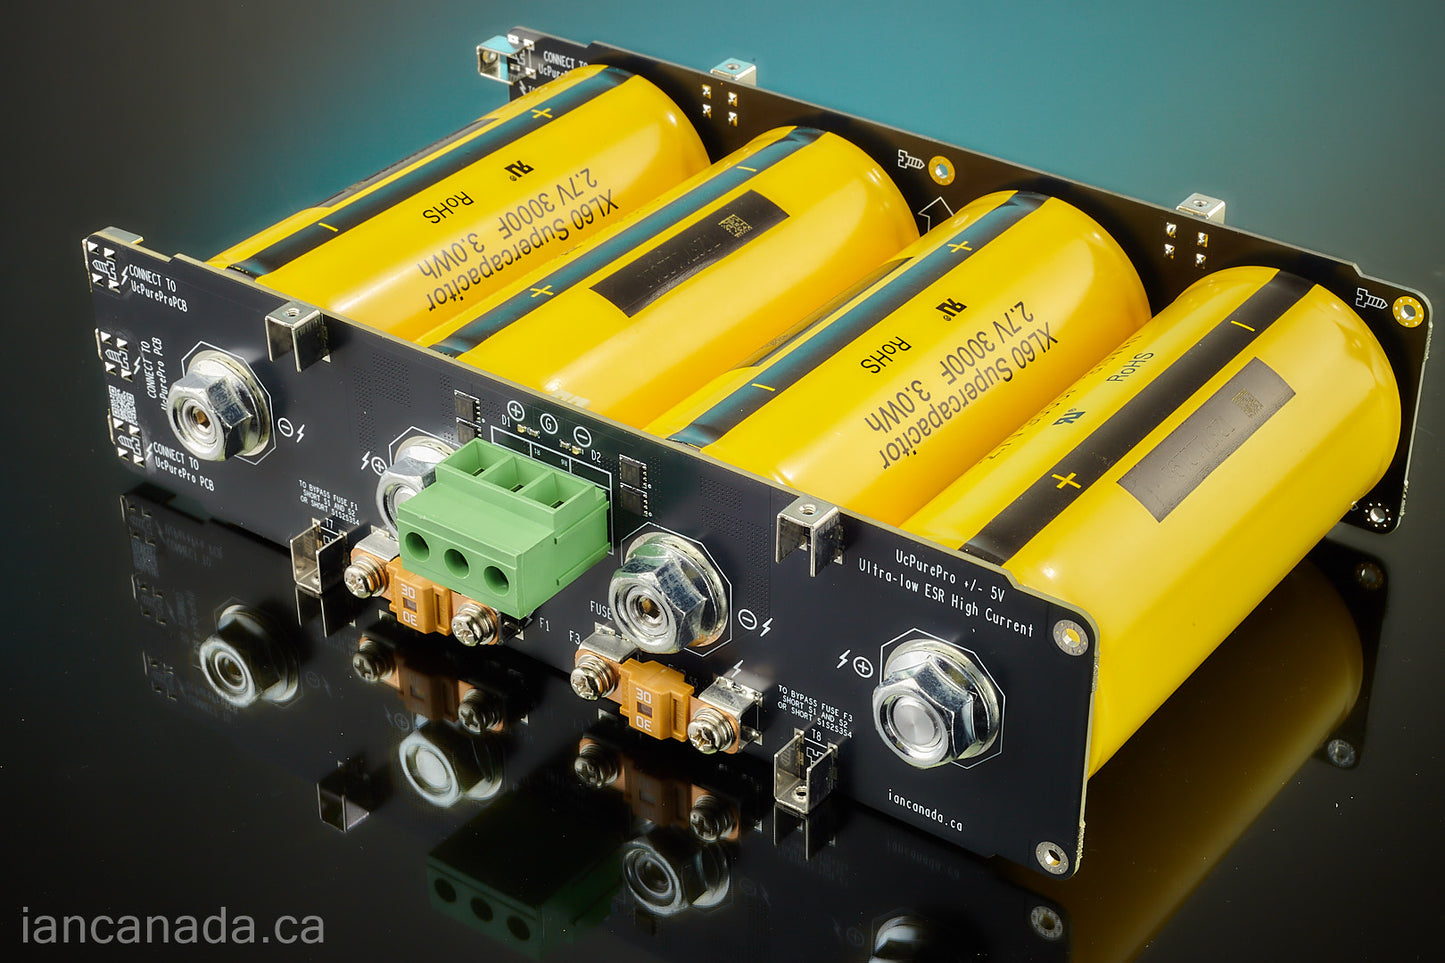
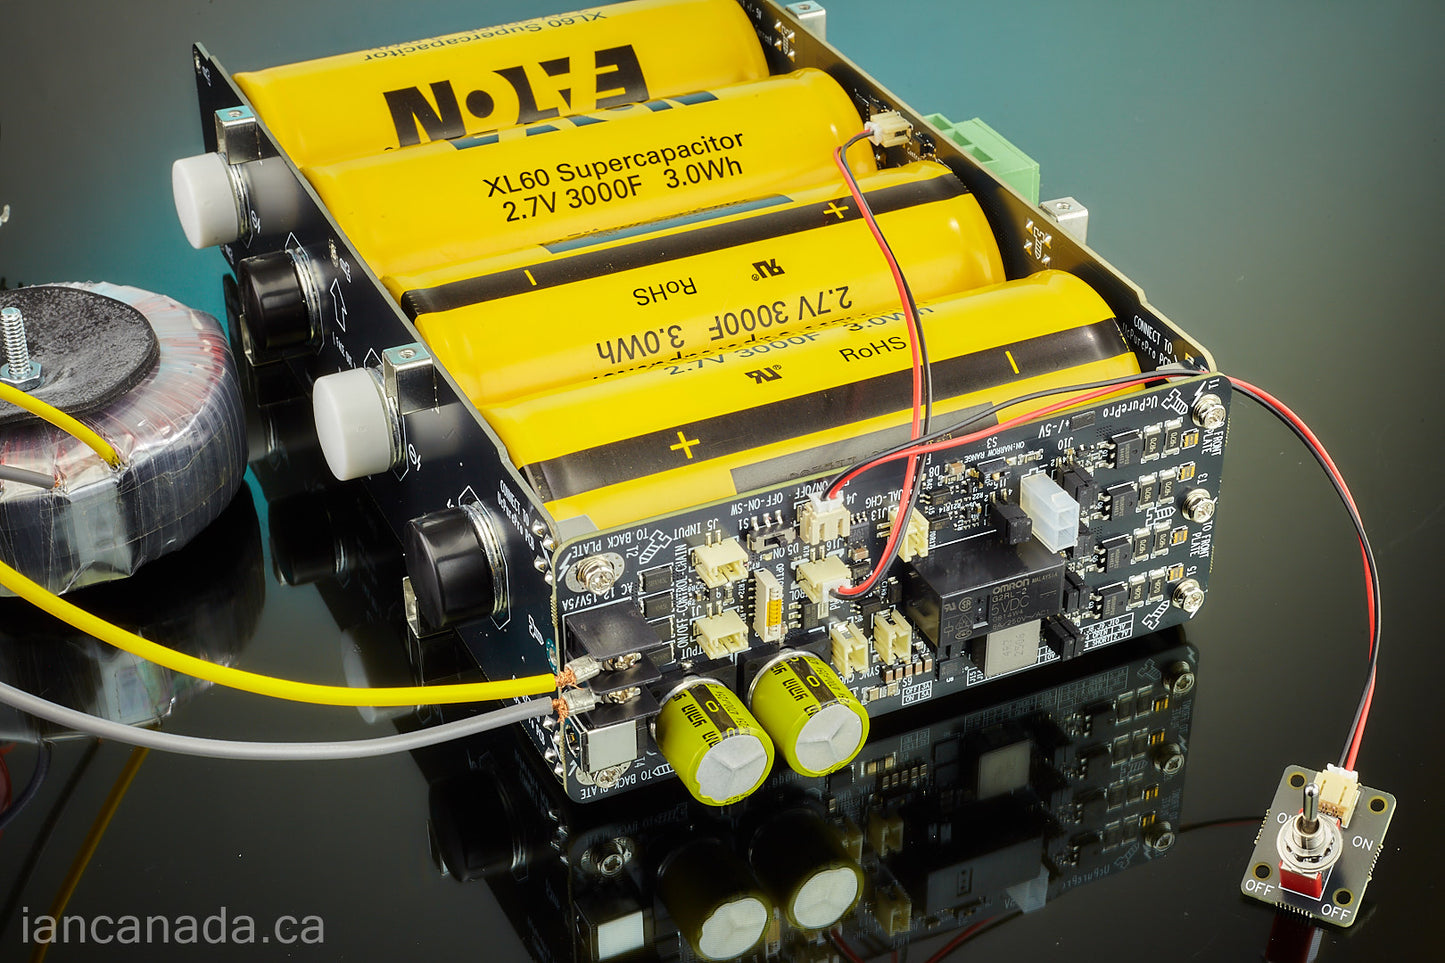
UcPure Pro is the third-generation ultracapacitor power supply. It makes use of the huge 3000F or higher capacitance ultracapacitor pack to achieve an ultimate power supply performance. Because it is a pure passive power supply, there will be neither feedback nor active components involved when it’s turned on. At the pure mode, the output is 100% isolated from input, only the pre-charged ultracapacitor pack will be connected to the load.
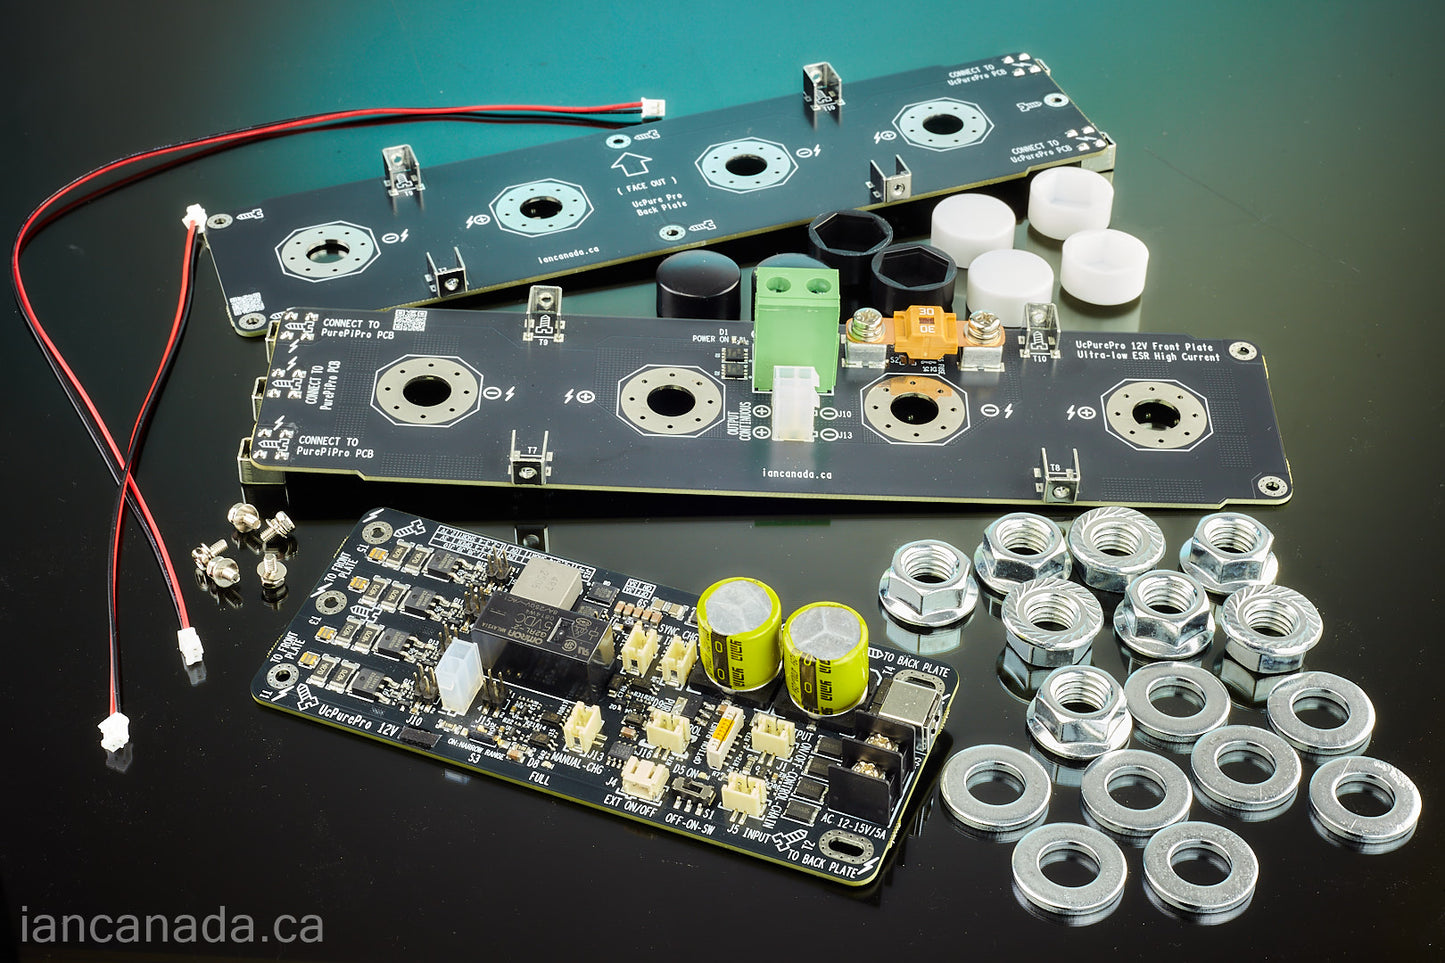
UcPure Pro revolutionary employs triple PCB architecture to separate the management PCB from the ultracapacitor pack PCBs. The output will be taken directly from the ultracapacitor pack without charging or other circuits involved. Bolt-down automotive fuses are first time being used by UcPure Pro for higher reliability and lower ESR.
UcPure Pro could be the best low noise, low ESR pure power supply in world so far. Sound quality of sensitive audio applications such as low jitter clock oscillators, DACs, FIFOs, I/V stages and many other circuits will be benefited greatly from this UcPure Pro power supply.
UcPure Pro New features
• Triple PCB architecture makes it has the lowest ESR and noise levels among all UcPure generations.
• Plate PCBs were developed to take the output directly from the ultracapacitor pack over much bigger double thickness multi-layers copper areas.
• Ultracapacitor plate PCBs are separate from management PCB for a much purer working condition.
• Only one control cable is needed between management PCB and plate PCB
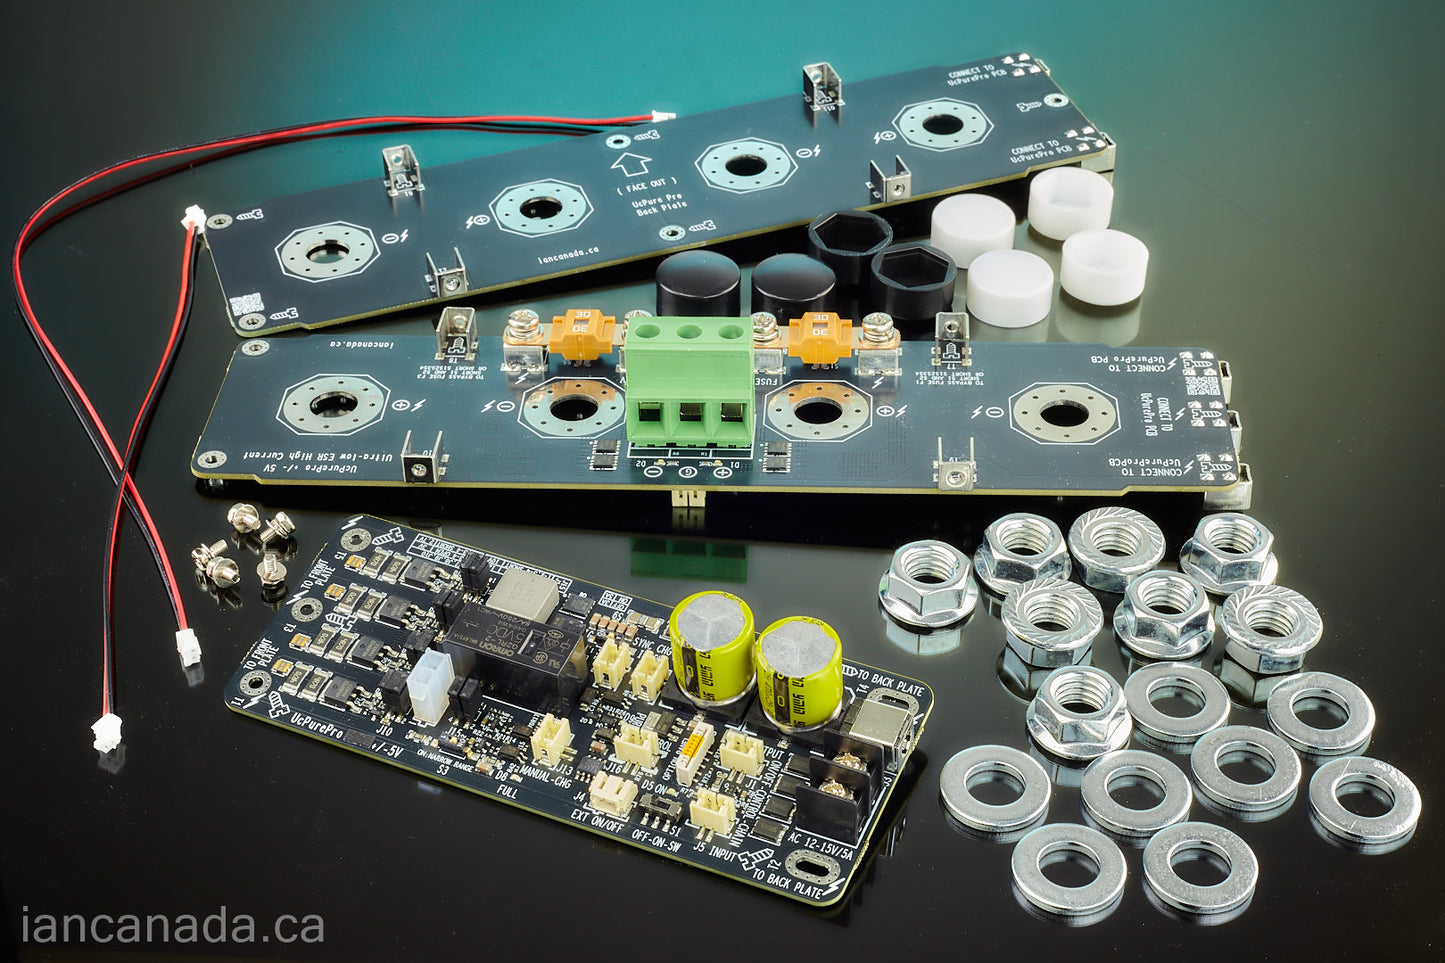
• +/-5V or 12V or 5V or 3.3V configurations
• 5V configuration has a USB-C output. Could the best low noise high quality USB power supply in the world.
• Has both precision and normal output voltage range control mode
• Precision balancers have been integrated on PCB, so no longer need external balancer/protection boards.
• Much reliable bolt-down automotive fuses are first time being used to improve the performance more
• Configurable input current limitation to protect AC/DC input without affecting the peak charging current. Can also save cost by using lower rated current transformers.
• Low profile design, easier to integrate with different projects and cases.
• 7.8A/10A high peak charging current, charge and re-charge ultracapacitors very fast
• Ultra-high current/low ESR output terminal connector, ideal for big or groups of power wires
• Optimized to AC input (12V AC for 3.3V, 5V, +/-5V configuration or 15V AC for 12V configuration), can also work with 15V to 19V DC input.
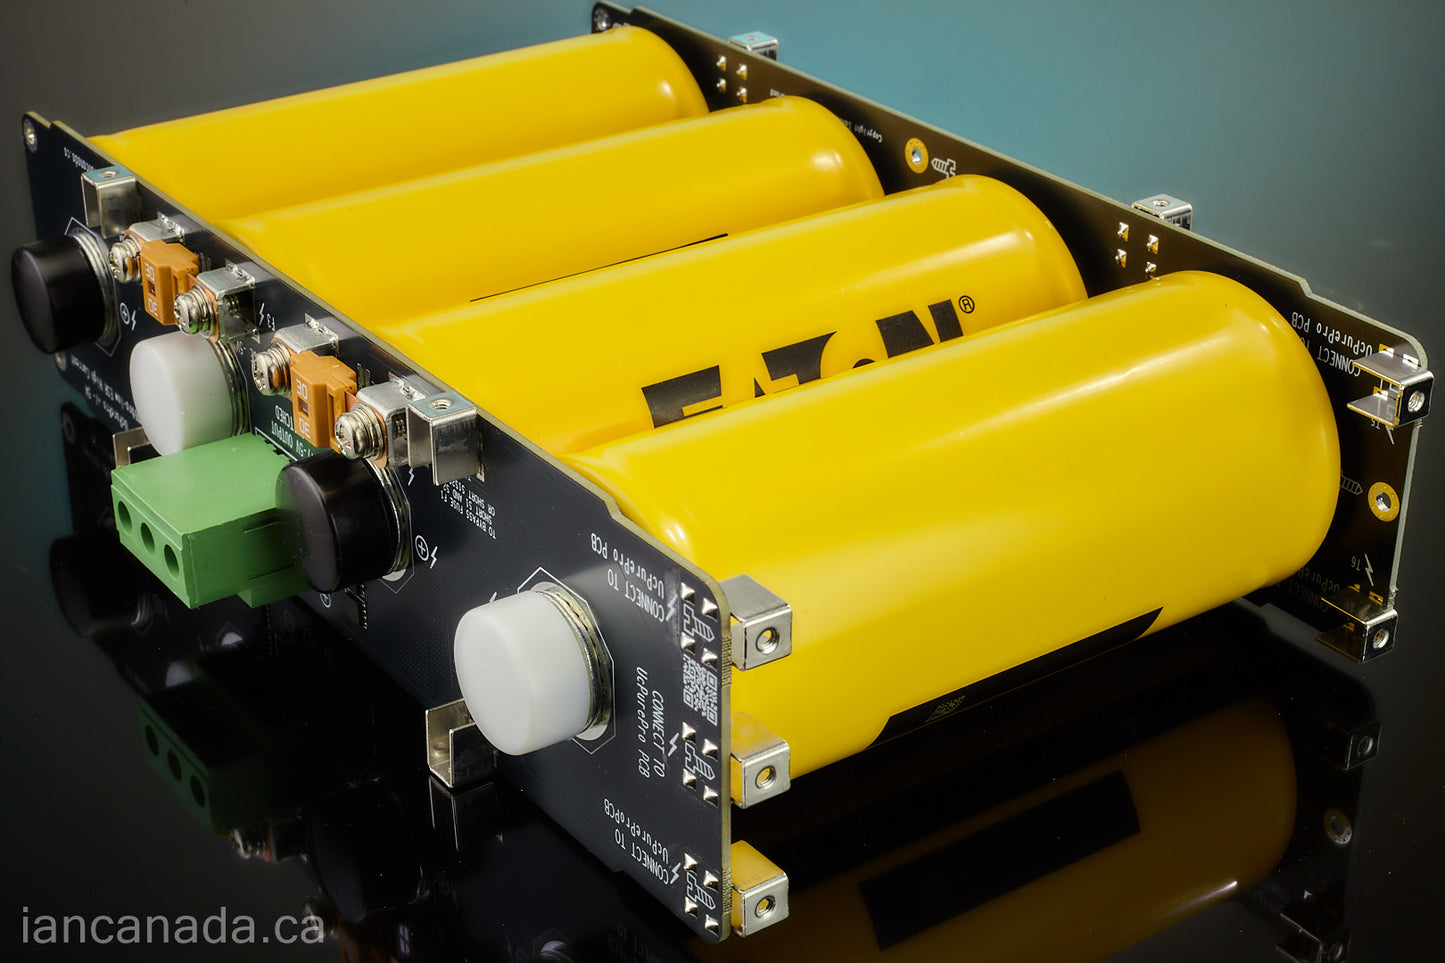
• Manual charging triggering push-button option
• Possible to have a control panel
Other Highlighted Features
• Pure ultracapacitor power supply
• Ultracapacitors work in class A mode which current going only in one direction.
• Outputs are 100% isolated from charger and power input at pure mode
• Can be controlled by the built-in /external on/off switch or control chain (optical isolated) of the whole power supply group
• Optical isolators are used for all internal operating logics
• Built-in protection scheme to prevent ultracapacitor from exhausted and low output voltage
• With a powerful SYNC UC charging function. Can re-charge the UCs during music stops. This feature can avoid the output voltage drop or trigger the protection mode even if you listen to music for a very long time. SYNC input control signal can be connected to the MUTE signal of a MonitorPi pro or a FifoPiQ7. More UcPures can work together with a SYNC control chain. This signal is optical isolated from UcPure so it doesn’t affect the power supply performance at all
• Heavy duty design for 24/7 operation
• DIY friendly, easy to install
Installation steps
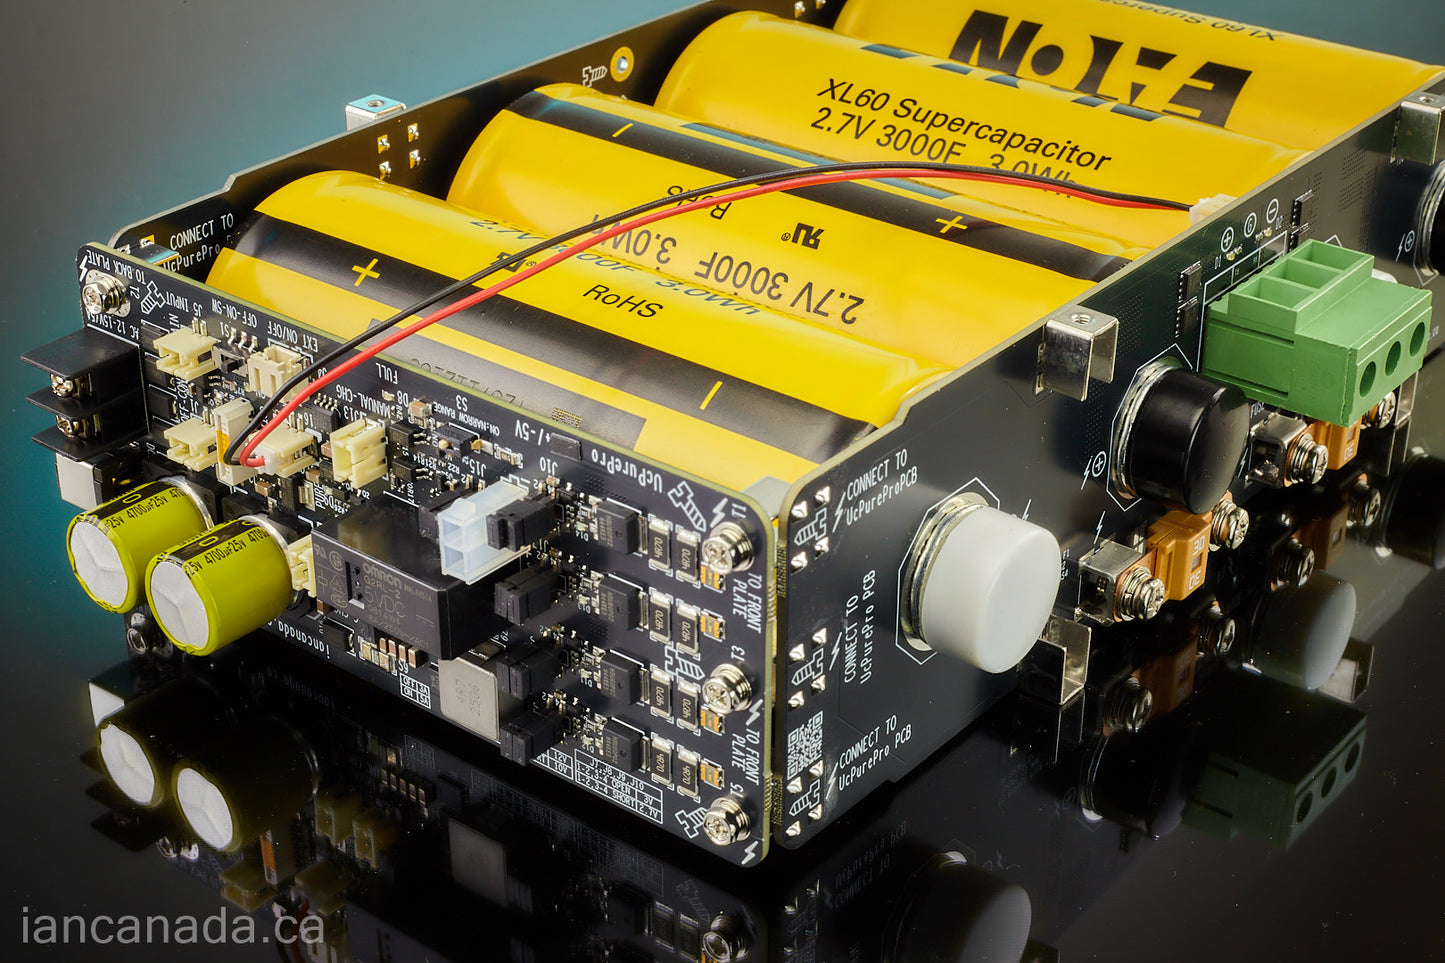
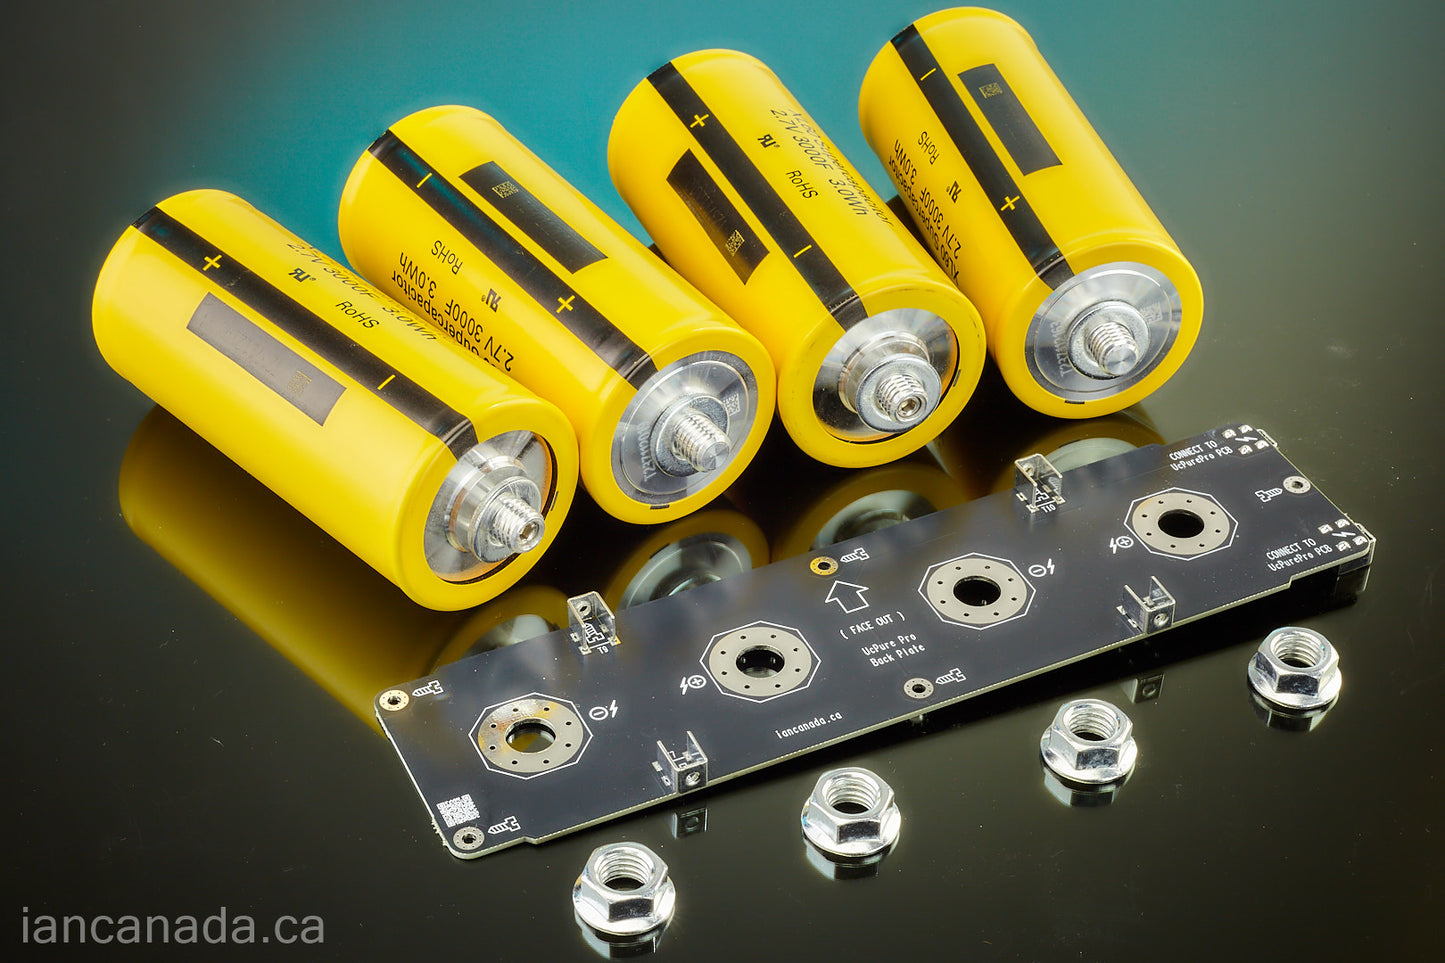
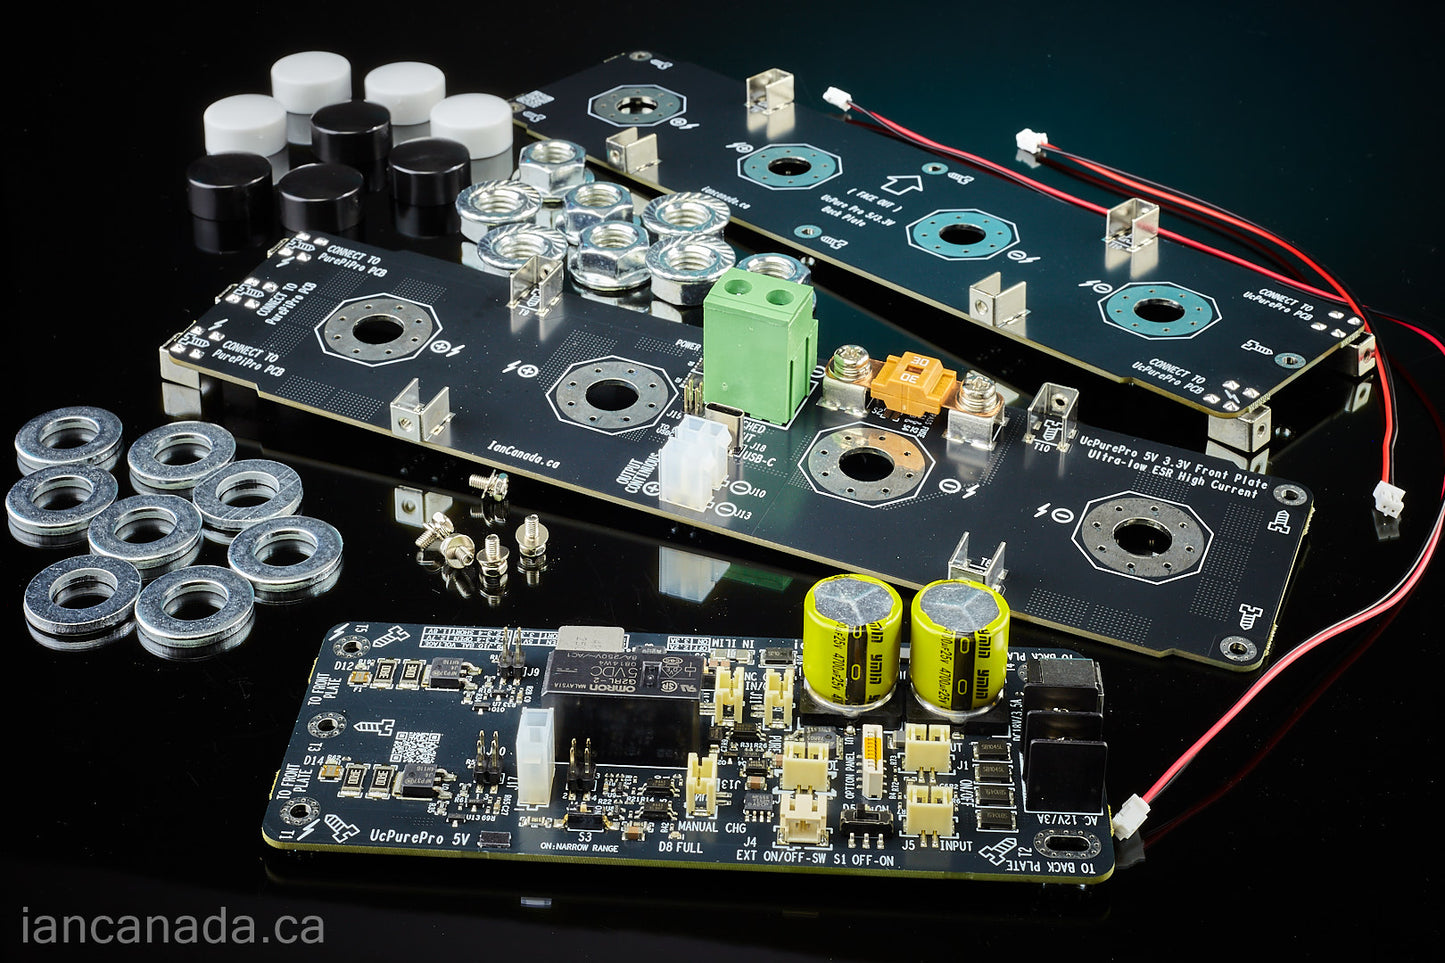
Step1: Install a 3mm thickness washer (or two 1.5mm washers) between each ultracapacitor terminal and PCB plate.

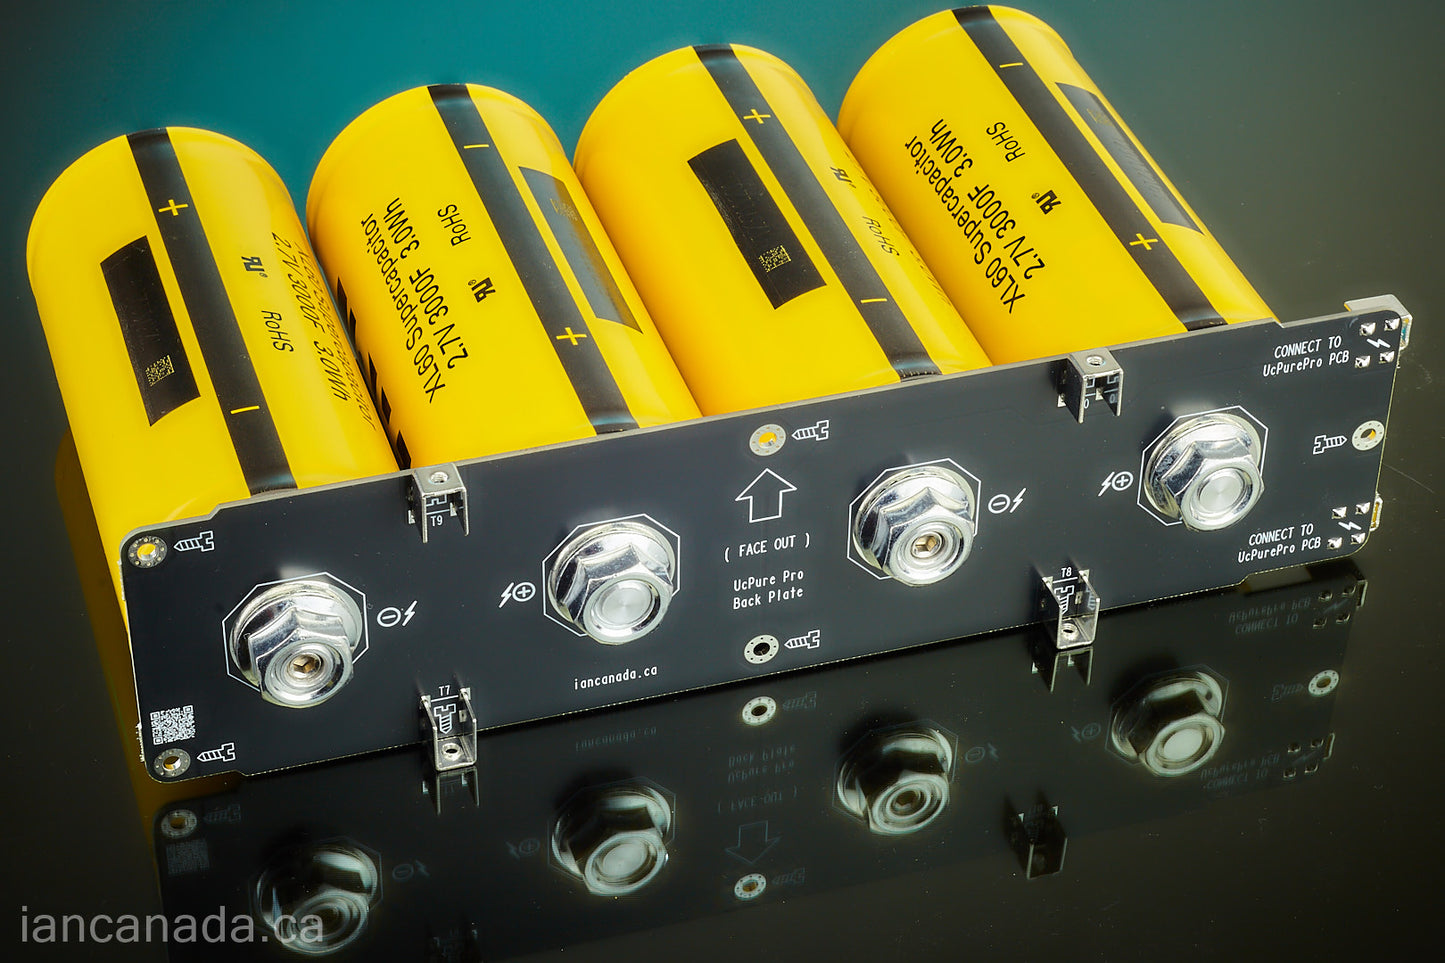
Step2: Make sure all ultracapacitors are fully discharged. Install all the four ultracapacitors into the UcPurePro back plate PCB in right orientations as the marks. Then screw the four 12mm nuts to the terminals (not tighten). Metal self-locking nuts are highly recommended to ensure best connection and lowest ESR under high current. Never use plastic nuts because of the possible poor connections!

Step3: Do the same as Step2 on the other side to assemble the UcPurePro front plate PCB to the ultracapacitor pack. Ensure no pins touch to the ultracapacitors at the both back side of the PCBs.

Step4: Put the ultracapacitor pack assembly on a flat surface, ensure the five connection terminals to the UcPurePro main board are at the same side. Tighten all eight self-locking nuts using nut socket tool KIT. Cover all the nuts with matched isolation caps to prevent from possible short circuits.

Step5: Install the UcPurePro +/-5V main board to the ultracapacitor pack terminals using the five 3mm spring washer screws. Ensure the screws are tightening. The last thing before finish the assembling job is to Install a PH2.0 control cable from the front plate to the J16 of the UcPure Pro main board.

Step6: Connect an AC transformer coil to the J3. 1182N15 of 12V configuration or 1182M12 for all other configurations. D3 will light up after the transformer is powered. If it is the first time of use, please wait an hour or so until the Full LED D8 is on. Then turn on the UcPurePro +/-5V power supply by the on-board or external ON-OFF switch, or by the control chain. The blue pure LED, and both D1 and D2 LEDs on the front plate will light up.

Now, the world best power supply is working and will be ready for your project.
In pure mode, the output will be 100% isolated from the input so the common mode noise transmission path will be eliminated. No ground loop can be built.
UcPure Pro +/-5V 12V User's manual
UcPure Pro 3.3V/5V User's manual
YouTube Video of UcPure Pro Gabster made a very nice video about UcPure Pro. That's really help for audiophile DIYers and it's highly appreciated.
Notes
- Each UcPure Pro needs an independent power input from an AC coil (or DC). Please never share this input with any other power supply or device.
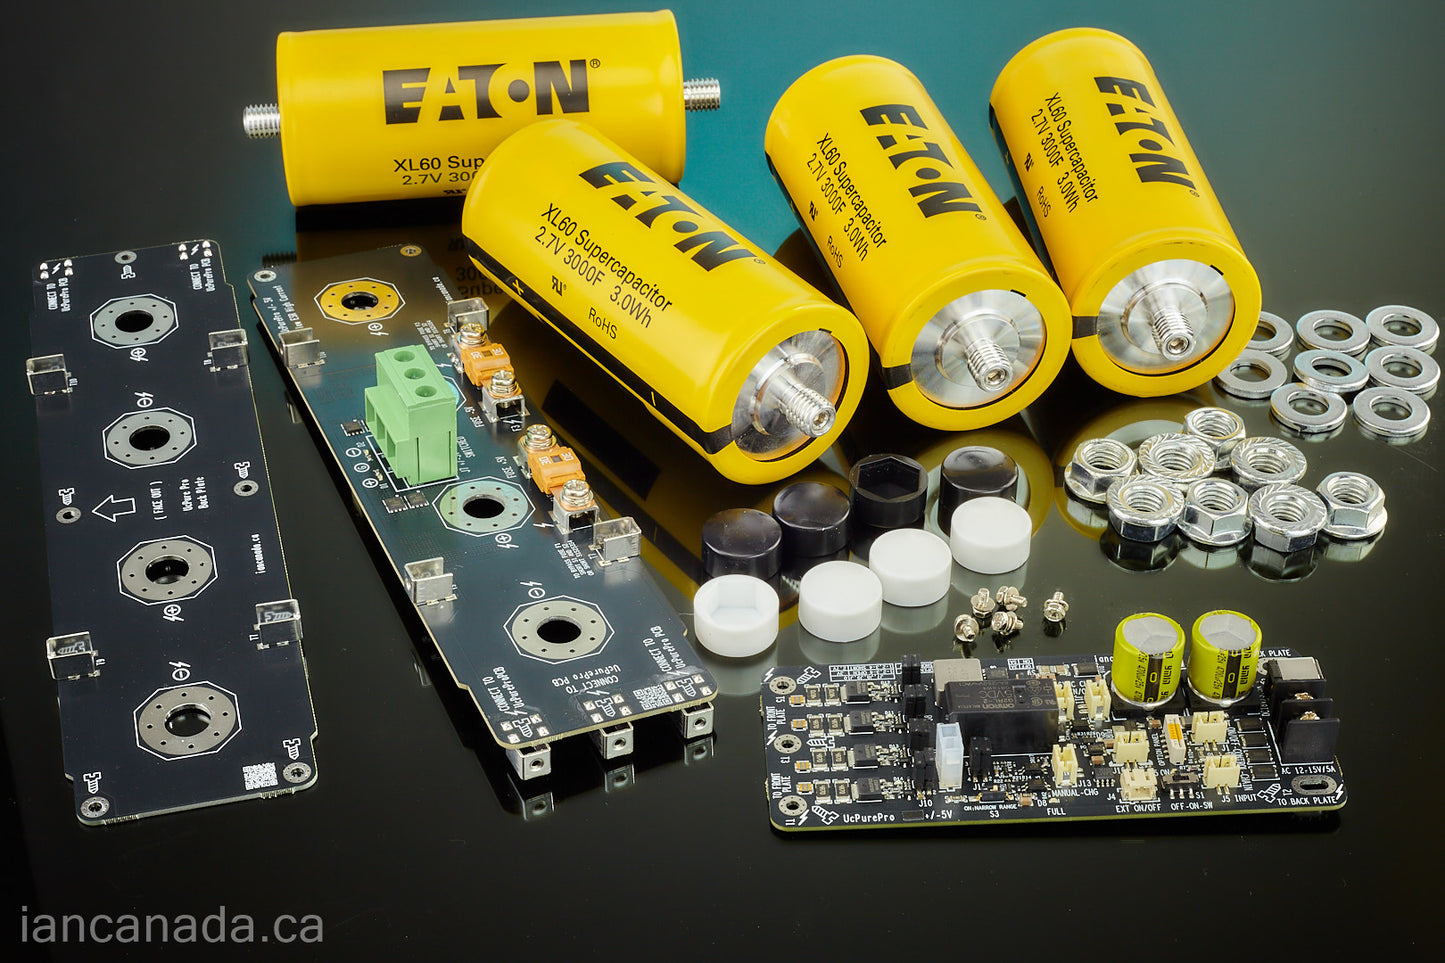
- Ultracapacitors are not included. Recommended ultracapacitor P/Ns are:
XL60-2R7308T-R or TPLH-2R7/3000SL60138 for all except 12V configuration
XL60-3R0308T-R or TPLH-3R0/3000SL60138 for 12V and all other configurations - To ensure the ultracapacitors are fully charged before turning on, It's highly recommended to keep the power input always connected.
- DC input is not recommend. When using DC input such as a standard laptop power adapter, the grounding pin (if there is any) of the power cord (plug) must be removed to avoid ground loop or possible short circuit.
- Washers must be installed between the ultracapacitors and the plate PCBs. If there is insufficient space between them, there is a risk of short circuit if the connector pins touch to the ultracapacitors. Please pay extreme caution.
Useful accessories
-
- UcDumper in case you need safely discharge ultracapacitors before or after installation
- External ON/OFF switch
- Fork spade terminal connectors
- #61B 40mm long PH2.0 control cable
-
#55A CmChoker Common Mode Noise Filter

UcPure generations Comparison Chart
|
Generations |
First UcPure |
Second UcPure Quad |
Third UcPure Pro |
|
Architecture |
One PCB |
Dual PCB |
Triple PCB, Management PCB separate from UC pack PCBs |
|
Balancer |
External |
Built-in |
Built-in, precision balancer |
|
Configuration |
3.3V, 5V and 15V |
3.3V, 5V |
3.3V, 5V, 12V, +/-5V |
|
ESR |
Low |
Ultra-low |
Lowest |
|
Ultra high current output connector |
No |
No |
Yes |
|
Precision output voltage control |
No |
No |
Yes |
|
Setable input current limitation |
No |
No |
Yes, 3A or 5A |
|
Peak UC charge current |
3.75A |
5.5A(default)/8.25A |
7.8A Fast charge |
|
Fuse |
Standard glass fuse |
Standard glass fuse |
Ultra low ESR high current bolt-down automotive fuse |
|
UC pack Direct output |
No |
Yes |
Yes |
|
Mounting dimensions |
Low profile |
High profile |
Low profile, flexible mounting positions |
|
Connections |
Power wires |
Screws and balance cable |
Screws and control cable |
|
ON/OFF control chain |
Yes |
Yes |
Yes |
|
SYNC charging |
Yes |
Yes |
Yes |
|
Manual charging button |
No |
No |
Yes |
|
Control panel option |
No |
No |
Yes |
|
Input type |
AC/DC |
AC(recommend)/DC |
AC(optimized)/DC |
|
Optical isolation |
Yes |
Yes |
Yes |